This is a continuation of my last post regarding imposition scripts in Adobe InDesign. The tutorial aspect of this post assumes that you have already setup a static imposition file in InDesign.
It’s important to understand that much of the following is not particularly elegant when it comes to workflow. Esko’s Deskpack plugins for Illustrator and Hybrids PackZ standalone application do a much better job.
THE PROBLEM | If however you are on a budget, don’t mind jumping through the extra hoops, and have some patience, you can successfully drive the occasional VDP job using this method.
Creating a Database
The VDP template that we are going to create will step the top most label row of our layout downwards, for each record that we have in our database. As it does so it will update each variable ‘field’ placed on the imposition according to the data in the linked database column.
A database column is required for every field in each “lane” of the layout. If the label is 2 across the web and each label has 3 variable data fields, the database requires a total of 6 columns (3 columns for lane 1 and 3 for lane 2).
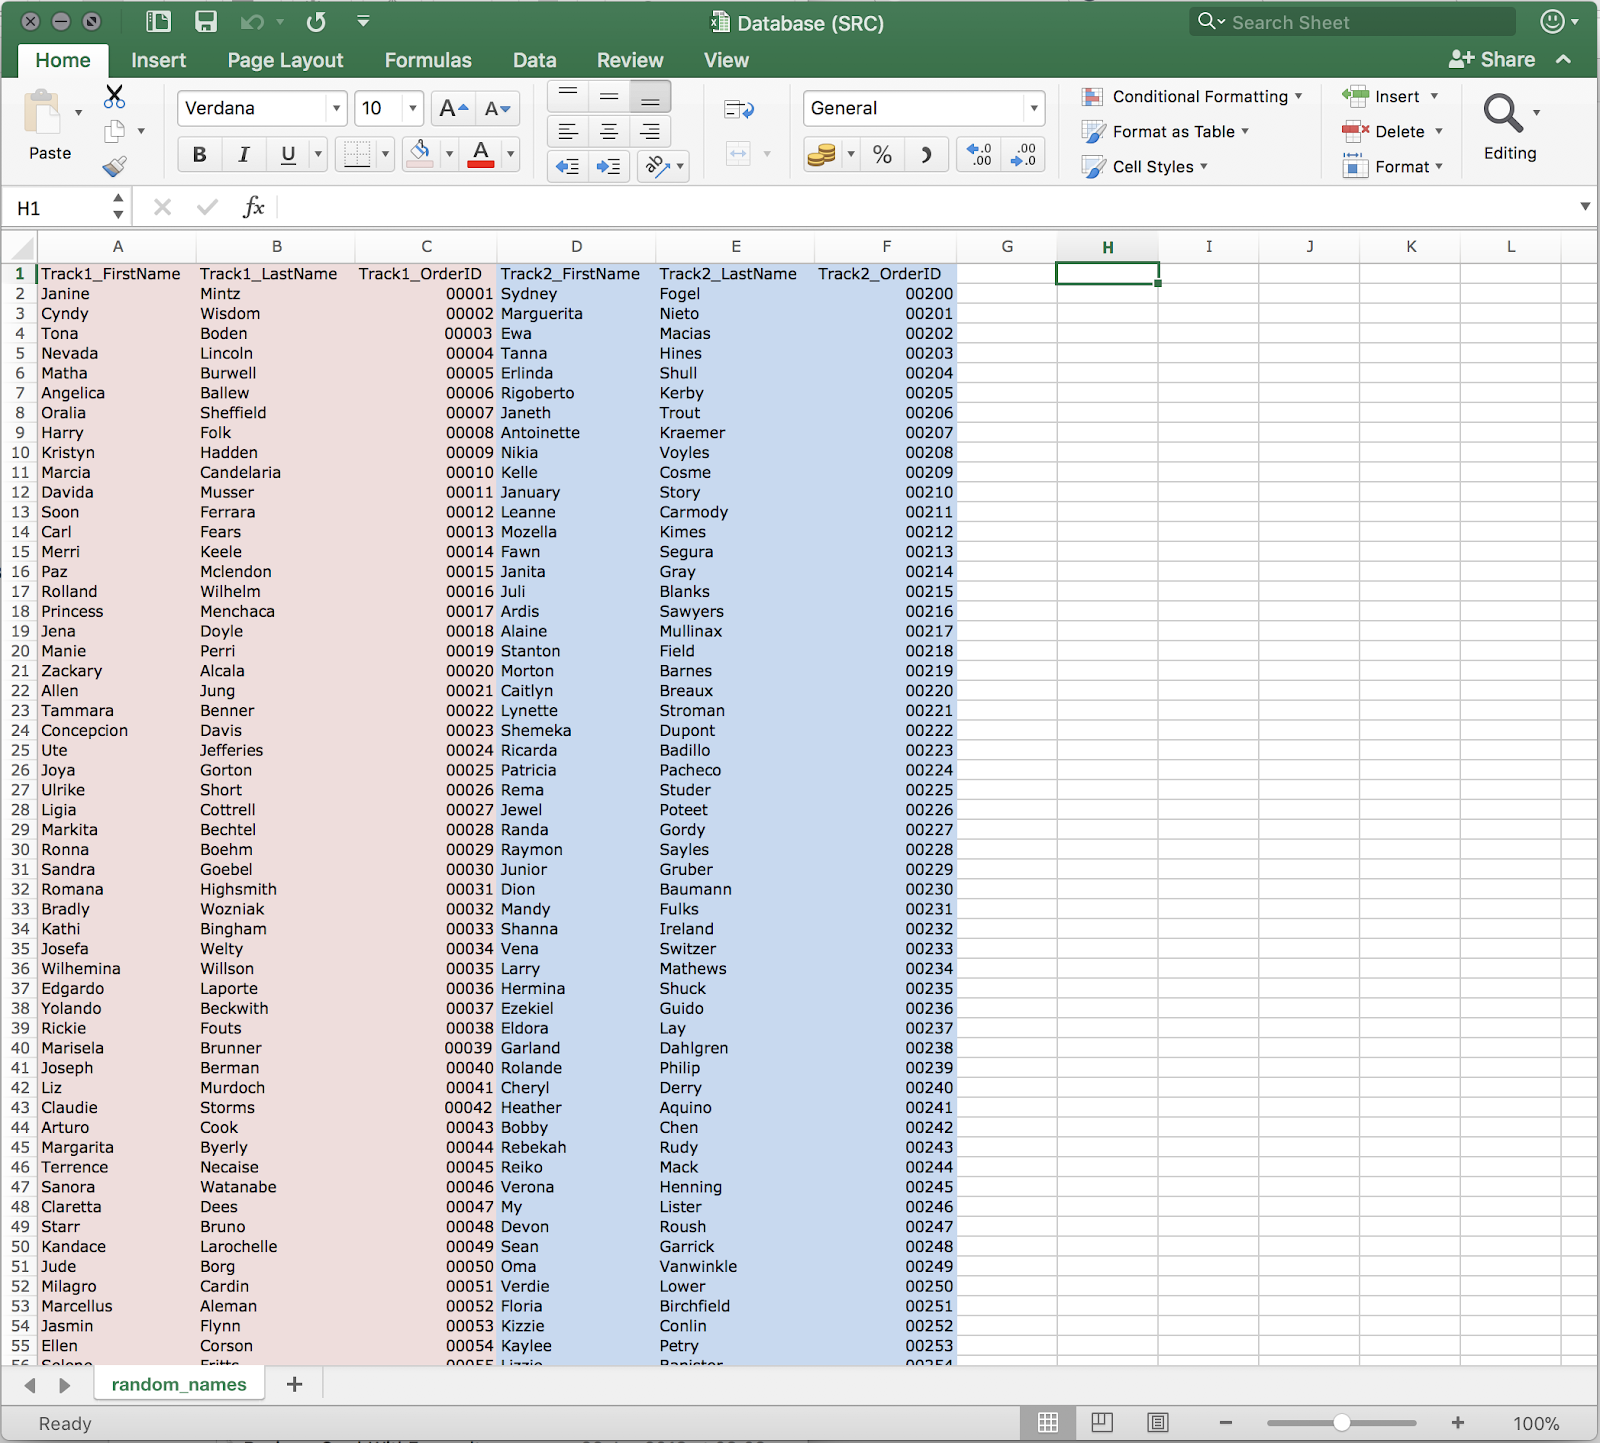
An example of a database for a 2 across imposition with where
each label has 3 variable fields.
For the example we are working with the cutter is 3 across and each label has 4 variable fields

An example of a database for a 3 across imposition with where each label has 5 variable fields.
The first row of the database is the ‘header’. This is the description for the rows underneath. The InDesign data merge tool does not create an imposition for the first row.
Here we see 15 columns. In the Header the first 5 are prefixed as ‘L1_’ (Lane1) and the second 5 as ‘L2_’ and the last 5 as ‘L3_’. For each lane we have num, address, city, postal and image.
TIP: For variable images the column name must start with the @ character to define it as an image path rather than a text field. In Excel the @ character is reserved so must be prefixed with a tick ‘ character. Using the example above, the entered header for the image column is ‘@L1_image.
NOTE: For the data rows, on a Mac the absolute path must be defined in the following format (using : colons):
Macintosh HD: <path to image> :Postcode101.pdf
On a Windows PC the path must be defined using the following format (using \ backslash):
C:\ <path to image> \Postcode101.pdf
Save the database as a .csv file. Be sure to back up your database as an excel file before you do this.
- File > Save As…
- Select ‘Comma Separated Values (.csv)’ from the file format dropdown
- Save the file somewhere sensible
- Close Excel
The .csv file is now ready to be imported into indesign.
Import the Database into InDesign
With your template file open:
- Import the csv file saved earlier by clicking the Data Merge flyout > Select Data Source.
- Browse to and Open the Database.csv file that we saved in the previous step.
The database is imported into InDesign. A list of all columns in the database is displayed using the ‘header’ row as the identifier.
If you make changes to the database don’t forget to update it in InDesign by clicking the Data Merge flyout > Update Data Source. This will reload the linked database file.
VDP Template Setup
Open the template you created using the imposition script.

Only the first row of content boxes are required. The InDesign Data Merge tools will create additional boxes for each record in the database.
- Ungroup the columns.
- Delete all rows in the layout apart from the top row.
- For the first label on the imposition grid:
- Use the Type Tool (T) to add text boxes and format some placeholder text.
- Use the Rectangle Frame Tool (F) to add content boxes for any variable images.

- Select all of your variable content boxes.
- Use the Step and Repeat feature Edit > Step and Repeat… to copy the selected content boxes across the imposition.
We are now ready to add variable text and images to these content boxes.
Add Variable Fields to the Template
- For the first text box, select the placeholder text with the Type Tool (T)
- Click on the required field in the Data Merge panel to add the field to the text box.
- The field header is displayed in the artwork enclosed with << and >> characters.
- Similarly, select the content box for the image and click the required field.
- Repeat the process for each field in the imposition. Be careful to ensure you use the correct lane identifiers (L1, L2, L3 etc.) in the correct lane of the imposition.
TIP: Static text will work in combination with variable fields. In the example given the letter UK and the date are static text.
- Toggle the Preview checkbox to preview the in the imposition. Move through each row of the database using the controls.
We are now ready to expand all of the records in the database into the InDesign template.
Expand the Job
- From the Data Merge flyout select Create Merged Document…
- Set the ‘Records per Document Page:’ dropdown to Multiple Records
- Click the Multiple Record Layout tab.
- If they are not already, set the left and right Margins to match the document setup.
NOTE: Check the margins in the layout by clicking Layout > Margins and Columns…
- Set layout of records to Columns First.
- Set the Spacing: Between Columns: to the Gap size minus 2mm (0.08in).
NOTE: Content boxes should include at least 1mm (0.04in) of bleed. For this reason you must subtract 2mm (0.08in) from the gap size when calculating the Between Rows figure.
- Check ‘Preview Multiple Record Layout’. Extra content boxes are generated for each record.
- Uncheck the preview and then click ‘OK’.
- Indesign will now create and open a new ‘merged’ InDesign document with multiple pages to cover all records in the database. This may take a while depending on the number of records in the database.
- Export to PDF.
Using Adobe InDesign For Narrow Web Label VDP
This is a continuation of my last post regarding imposition scripts in Adobe InDesign. The tutorial aspect of this post assumes that you have already setup a static imposition file in InDesign.
It’s important to understand that much of the following is not particularly elegant when it comes to workflow. Esko’s Deskpack plugins for Illustrator and Hybrids PackZ standalone application do a much better job.
THE PROBLEM | If however you are on a budget, don’t mind jumping through the extra hoops, and have some patience, you can successfully drive the occasional VDP job using this method.
Creating a Database
The VDP template that we are going to create will step the top most label row of our layout downwards, for each record that we have in our database. As it does so it will update each variable ‘field’ placed on the imposition according to the data in the linked database column.
A database column is required for every field in each “lane” of the layout. If the label is 2 across the web and each label has 3 variable data fields, the database requires a total of 6 columns (3 columns for lane 1 and 3 for lane 2).
An example of a database for a 2 across imposition with where
each label has 3 variable fields.
For the example we are working with the cutter is 3 across and each label has 4 variable fields
An example of a database for a 3 across imposition with where each label has 5 variable fields.
The first row of the database is the ‘header’. This is the description for the rows underneath. The InDesign data merge tool does not create an imposition for the first row.
Here we see 15 columns. In the Header the first 5 are prefixed as ‘L1_’ (Lane1) and the second 5 as ‘L2_’ and the last 5 as ‘L3_’. For each lane we have num, address, city, postal and image.
TIP: For variable images the column name must start with the @ character to define it as an image path rather than a text field. In Excel the @ character is reserved so must be prefixed with a tick ‘ character. Using the example above, the entered header for the image column is ‘@L1_image.
NOTE: For the data rows, on a Mac the absolute path must be defined in the following format (using : colons):
Macintosh HD: <path to image> :Postcode101.pdf
On a Windows PC the path must be defined using the following format (using \ backslash):
C:\ <path to image> \Postcode101.pdf
Save the database as a .csv file. Be sure to back up your database as an excel file before you do this.
- File > Save As…
- Select ‘Comma Separated Values (.csv)’ from the file format dropdown
- Save the file somewhere sensible
- Close Excel
The .csv file is now ready to be imported into indesign.
Import the Database into InDesign
With your template file open:
- Import the csv file saved earlier by clicking the Data Merge flyout > Select Data Source.
- Browse to and Open the Database.csv file that we saved in the previous step.
The database is imported into InDesign. A list of all columns in the database is displayed using the ‘header’ row as the identifier.
If you make changes to the database don’t forget to update it in InDesign by clicking the Data Merge flyout > Update Data Source. This will reload the linked database file.
VDP Template Setup
Open the template you created using the imposition script.
Only the first row of content boxes are required. The InDesign Data Merge tools will create additional boxes for each record in the database.
- Ungroup the columns.
- Delete all rows in the layout apart from the top row.
- For the first label on the imposition grid:
- Use the Type Tool (T) to add text boxes and format some placeholder text.
- Use the Rectangle Frame Tool (F) to add content boxes for any variable images.
- Select all of your variable content boxes.
- Use the Step and Repeat feature Edit > Step and Repeat… to copy the selected content boxes across the imposition.
We are now ready to add variable text and images to these content boxes.
Add Variable Fields to the Template
- For the first text box, select the placeholder text with the Type Tool (T)
- Click on the required field in the Data Merge panel to add the field to the text box.
- The field header is displayed in the artwork enclosed with << and >> characters.
- Similarly, select the content box for the image and click the required field.
- Repeat the process for each field in the imposition. Be careful to ensure you use the correct lane identifiers (L1, L2, L3 etc.) in the correct lane of the imposition.
TIP: Static text will work in combination with variable fields. In the example given the letter UK and the date are static text.
- Toggle the Preview checkbox to preview the in the imposition. Move through each row of the database using the controls.
We are now ready to expand all of the records in the database into the InDesign template.
Expand the Job
- From the Data Merge flyout select Create Merged Document…
- Set the ‘Records per Document Page:’ dropdown to Multiple Records
- Click the Multiple Record Layout tab.
- If they are not already, set the left and right Margins to match the document setup.
NOTE: Check the margins in the layout by clicking Layout > Margins and Columns…
- Set layout of records to Columns First.
- Set the Spacing: Between Columns: to the Gap size minus 2mm (0.08in).
NOTE: Content boxes should include at least 1mm (0.04in) of bleed. For this reason you must subtract 2mm (0.08in) from the gap size when calculating the Between Rows figure.
- Check ‘Preview Multiple Record Layout’. Extra content boxes are generated for each record.
- Uncheck the preview and then click ‘OK’.
- Indesign will now create and open a new ‘merged’ InDesign document with multiple pages to cover all records in the database. This may take a while depending on the number of records in the database.
- Export to PDF.